
Cobot Programming for Beginners: From Hand-Guiding to Your First Program
Cobot Programming for Beginners: From Hand-Guiding to Your First Program
If you have never programmed a robot before, the idea of writing your first routine can feel intimidating. It shouldn't. Cobot programming for beginners has almost nothing in common with the industrial robot programming of twenty years ago. You do not need a robotics degree, you do not need to learn a proprietary text language, and you do not need a system integrator on site for a week. On a modern collaborative robot you physically take the arm by the wrist, move it where you want it, press a button to save that position, and repeat. That is the whole idea behind hand-guiding, and it is why a machine operator with no programming background can usually get a simple pick-and-place running in an afternoon.
This guide walks you through the full path: what to prepare before you switch the robot on, how hand-guiding actually works, how to turn a handful of taught points into a reliable cycle with gripper control and machine handshakes, and how to test it without breaking anything. At the end you will find the mistakes we see most often at TMC Robotics when customers deploy their first cobot.
What cobot programming actually means
A robot program is nothing more than an ordered list of instructions. Roughly 90% of a first program consists of only four kinds of instruction:
- Motion. Go to a saved position, in a straight line or along a joint path.
- I/O. Switch an output on or off (close the gripper, start the vacuum), or wait for an input to go high (the machine door is open, a part is present).
- Logic. Loop, count, branch on a condition, stop on an error.
- Waits and timers. Give the gripper time to close, give the machine time to react.
Everything else is refinement. If you can describe your task out loud as a sequence of "go here, close, go there, open", you can already write it. The teach pendant simply turns that sentence into a program.
Before you touch the robot: three things to decide
1. Pick a task the robot can actually do well
Your first application should be repetitive, low-mix and forgiving. Loading parts into a machine, stacking finished pieces, transferring items between two conveyors, or feeding a test station are all good candidates. Avoid anything that needs fine judgement, deals with parts that arrive in a random jumble, or has a cycle time you cannot afford to miss on day one. If you are unsure whether your task is a good fit, our customer cases show a realistic range of what a cobot handles day to day.
2. Choose the tooling before you program
The gripper decides half of your program. A two-finger electric gripper needs an open and close signal and a grip width; a vacuum cup gripper needs a vacuum generator and a part-present check. Both change the approach angle and the clearance you need above the part. Mount and wire the tool first, then teach positions, otherwise every point you save will be wrong. Our guide on choosing the right gripper covers the trade-offs in detail.
3. Fix how the parts are presented
This is the single biggest predictor of whether a first cobot project succeeds. A robot repeats positions beautifully, but it only knows where a part is if the part is always in the same place. A simple machined nest, a locating fixture, a magazine or an indexed tray removes an enormous amount of programming complexity. Every hour spent on part presentation saves several hours of programming and troubleshooting later.
Step 1: Get comfortable with the teach pendant
The teach pendant is your interface to the robot: a touchscreen with jog controls, a program tree, an I/O overview and an enabling device. Before you program anything, spend fifteen minutes just jogging. Move the arm in joint mode, where each of the six axes moves individually, and then in Cartesian mode, where the tool moves along X, Y and Z relative to the base or the tool frame.
Jogging teaches you two things quickly: where the robot's reach runs out, and where its awkward poses are. Every six-axis arm has configurations near full extension or directly above its own base where joints have to swing wildly to make a small tool movement. Finding those areas now saves you from discovering them mid-cycle later.
Step 2: Hand-guiding, the fastest way to teach positions
Hand-guiding, sometimes called free-drive or lead-through teaching, puts the robot in a compliant mode where you can physically push and pull the arm into place. On most cobots you hold a button on the wrist or the pendant, move the arm, release the button, and the arm holds position. Then you press "save waypoint" and that pose becomes a named point in your program.
A few habits make hand-guiding much more accurate:
- Guide from the wrist, not the elbow. Pushing near the tool gives you far finer control than pushing on the upper arm.
- Teach with the real tool fitted. The gripper defines the tool centre point, and teaching without it means re-teaching everything afterwards.
- Set your tool centre point and payload first. If the robot does not know the mass and centre of gravity of what it is carrying, both hand-guiding feel and collision detection will be off.
- Teach approach and retreat points, not just the grip point. A point 50 mm above the part and a point 50 mm above the drop-off make the whole cycle safer and easier to adjust.
- Name your waypoints. "PickApproach" and "PlaceDrop" are worth far more in six months than "P7" and "P8".
Step 3: Turn waypoints into motion
With the points taught, you connect them with move commands. There are two you will use constantly:
- Joint moves take the fastest path through joint space. The tool follows a curved path, but the motion is quick and smooth. Use these for long transfers through open space.
- Linear moves drive the tool along a straight line in space. Use these for the last few centimetres into a fixture, into a chuck, or out of a machine, where the path matters.
A classic pick-and-place then reads: joint move to pick approach, linear move down to pick, close gripper, linear move up to approach, joint move to place approach, linear move down to place, open gripper, linear move up, joint move home. That is nine lines, and it is a complete working cycle.
Once it runs, you can start blending: allowing the robot to round off corners between waypoints instead of coming to a full stop at each one. Blending is usually the single biggest cycle-time win available to a beginner, and it costs nothing.
Step 4: Add I/O so the cell can talk to itself
A robot that only moves is a demo. A robot that reacts to its surroundings is production. Digital outputs from the controller drive your gripper, vacuum generator or signal lamp; digital inputs tell the robot that a part is present, a machine has finished, or an operator has pressed start.
Two patterns cover most first programs:
- Set and wait. Set the gripper output, then wait for the gripper's feedback input, or wait a fixed time if there is no feedback. Never assume the gripper closed instantly.
- Handshake. The robot waits for a "ready" signal from the machine, does its work, then sets a "done" signal back. Two wires and two lines of program remove almost all timing guesswork.
Fairino controllers expose standard digital and analog I/O plus Modbus, so wiring a cobot to an existing PLC or CNC is a normal electrical job rather than a software project. If you are planning that step, our article on open APIs for cobots explains what is available beyond the pendant.
Step 5: Loops, counters and offsets
The moment your program has to handle more than one part, you need a little logic. Three constructs cover most cases:
- A loop repeats the cycle until a stop condition, so the operator does not have to press start for every part.
- A counter tracks how many parts have been handled, which lets you stop after a full tray and log throughput.
- An offset shifts a taught position by a fixed distance. Teach one pocket in a tray, then step the position by the pitch in X and Y and you have programmed a whole grid without teaching every cell.
Offsets are the moment most beginners realise a robot program is not a recording, it is a small piece of software. That is also the point where scripting starts to pay off. If you get there, our hands-on guide to Lua programming on Fairino cobots picks up exactly where the pendant leaves off.
Step 6: Test safely before you run at speed
Never let a new program run at full speed on its first attempt. Work through it in stages:
- Step through the program line by line with the arm stationary where possible, checking each waypoint on screen.
- Run the full cycle at heavily reduced speed, typically 10 to 25%, with your hand near the stop button and no real parts in the fixture.
- Run with real parts, still at reduced speed, and watch clearances at every approach and retreat.
- Raise the speed in increments, checking after each step that the gripper still lands cleanly and nothing shifts.
Speed is also a safety matter, not just a programming one. A cobot is only collaborative in the context of a proper risk assessment of the whole application, including the tool and the part it carries. Before you leave a cell running next to people, read our guide on whether cobots still need a safety fence.
Step 7: Save, back up and document
When the cycle runs the way you want it, export the program and store it somewhere other than the controller. Note the tool centre point, the payload setting, the I/O assignments and the speed you settled on. A one-page sheet taped inside the cabinet door will save the next person hours, and it makes recovering from a controller swap a ten-minute job instead of a lost afternoon.
Common beginner mistakes
- Forgetting the gripper in the payload. Payload is the part plus the tool. A 3 kg part with a 2 kg gripper needs a robot rated well above 3 kg.
- Teaching only the grip point. Without approach and retreat points, the robot drives diagonally into fixtures.
- Skipping the tool centre point. Every linear move and rotation will be subtly wrong until it is set correctly.
- Programming around bad part presentation. Fix the fixture, not the program.
- Choosing a hard first application. Prove the concept on something simple, then scale. Confidence in the team matters as much as the technology.
A realistic first-day timeline
For a straightforward pick-and-place with a well-presented part and a mounted gripper, a realistic day looks like this: an hour to unbox, mount and power up, an hour of jogging and getting familiar with the pendant, an hour to set the tool centre point and payload and teach the waypoints, an hour to add I/O and logic, and then two or three hours of testing and tuning. Most people are running a repeatable cycle before the end of the day and spend the following week refining cycle time and error handling.
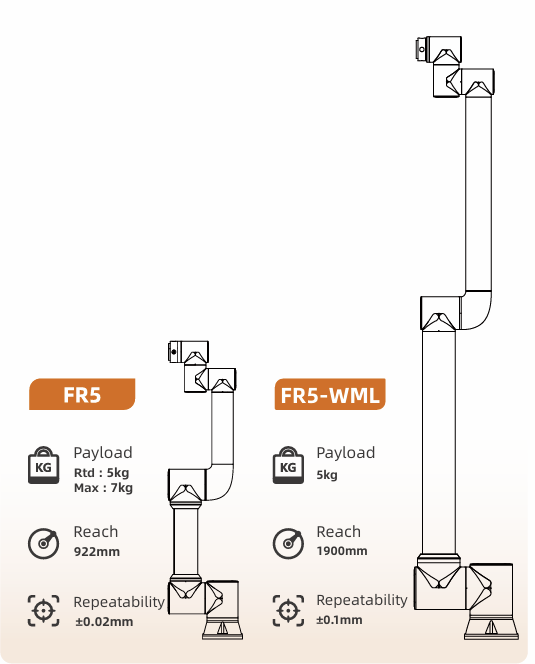
Larger or heavier applications take longer, mainly because of tooling and fixtures rather than programming. If you are sizing the robot itself, our guide to payload versus reach helps you pick between models such as the FR3 at 3 kg and 622 mm, the FR5 at 5 kg and 922 mm, and the FR10 at 10 kg and 1400 mm, or you can compare the full range on our products page.
Foire aux questions
Do I need to know how to code to program a cobot?
No. A first program is built on the teach pendant from taught positions, move commands and I/O instructions, with no text programming at all. Coding only becomes relevant when you want advanced logic, external data or integration with other systems, and even then it is optional.
How long does it take to learn cobot programming?
Most operators are productive on basic pick-and-place after one day of hands-on use, and comfortable with I/O, loops and offsets within a week. Complex applications such as welding or vision-guided picking take longer, mostly because of the process rather than the robot.
What is hand-guiding and is it safe?
Hand-guiding is a mode in which you physically move the robot arm to teach positions. It runs at reduced, monitored speed with force limits, and the arm only moves while you actively hold the enabling control. It is designed for exactly this use, but it still belongs inside a documented risk assessment of your application.
Can I reprogram a cobot for a different product later?
Yes, and that flexibility is the main reason to buy one. Changing a cobot over to a new part usually means re-teaching a handful of positions and possibly swapping tooling, which is a matter of hours rather than the weeks a dedicated machine would need.
Getting started with your first cobot
Cobot programming for beginners is far less about software than about preparation: a well-chosen first task, the right gripper, and parts that always land in the same place. Get those three right and the programming is genuinely a matter of hours. As the European distributor for Fairino, TMC Robotics helps customers pick the right model, specify the tooling and get the first cycle running, so you are not learning alone.
Want help scoping your first application? Request a quote with a short description of your task, or get in touch and we will talk it through with you.
